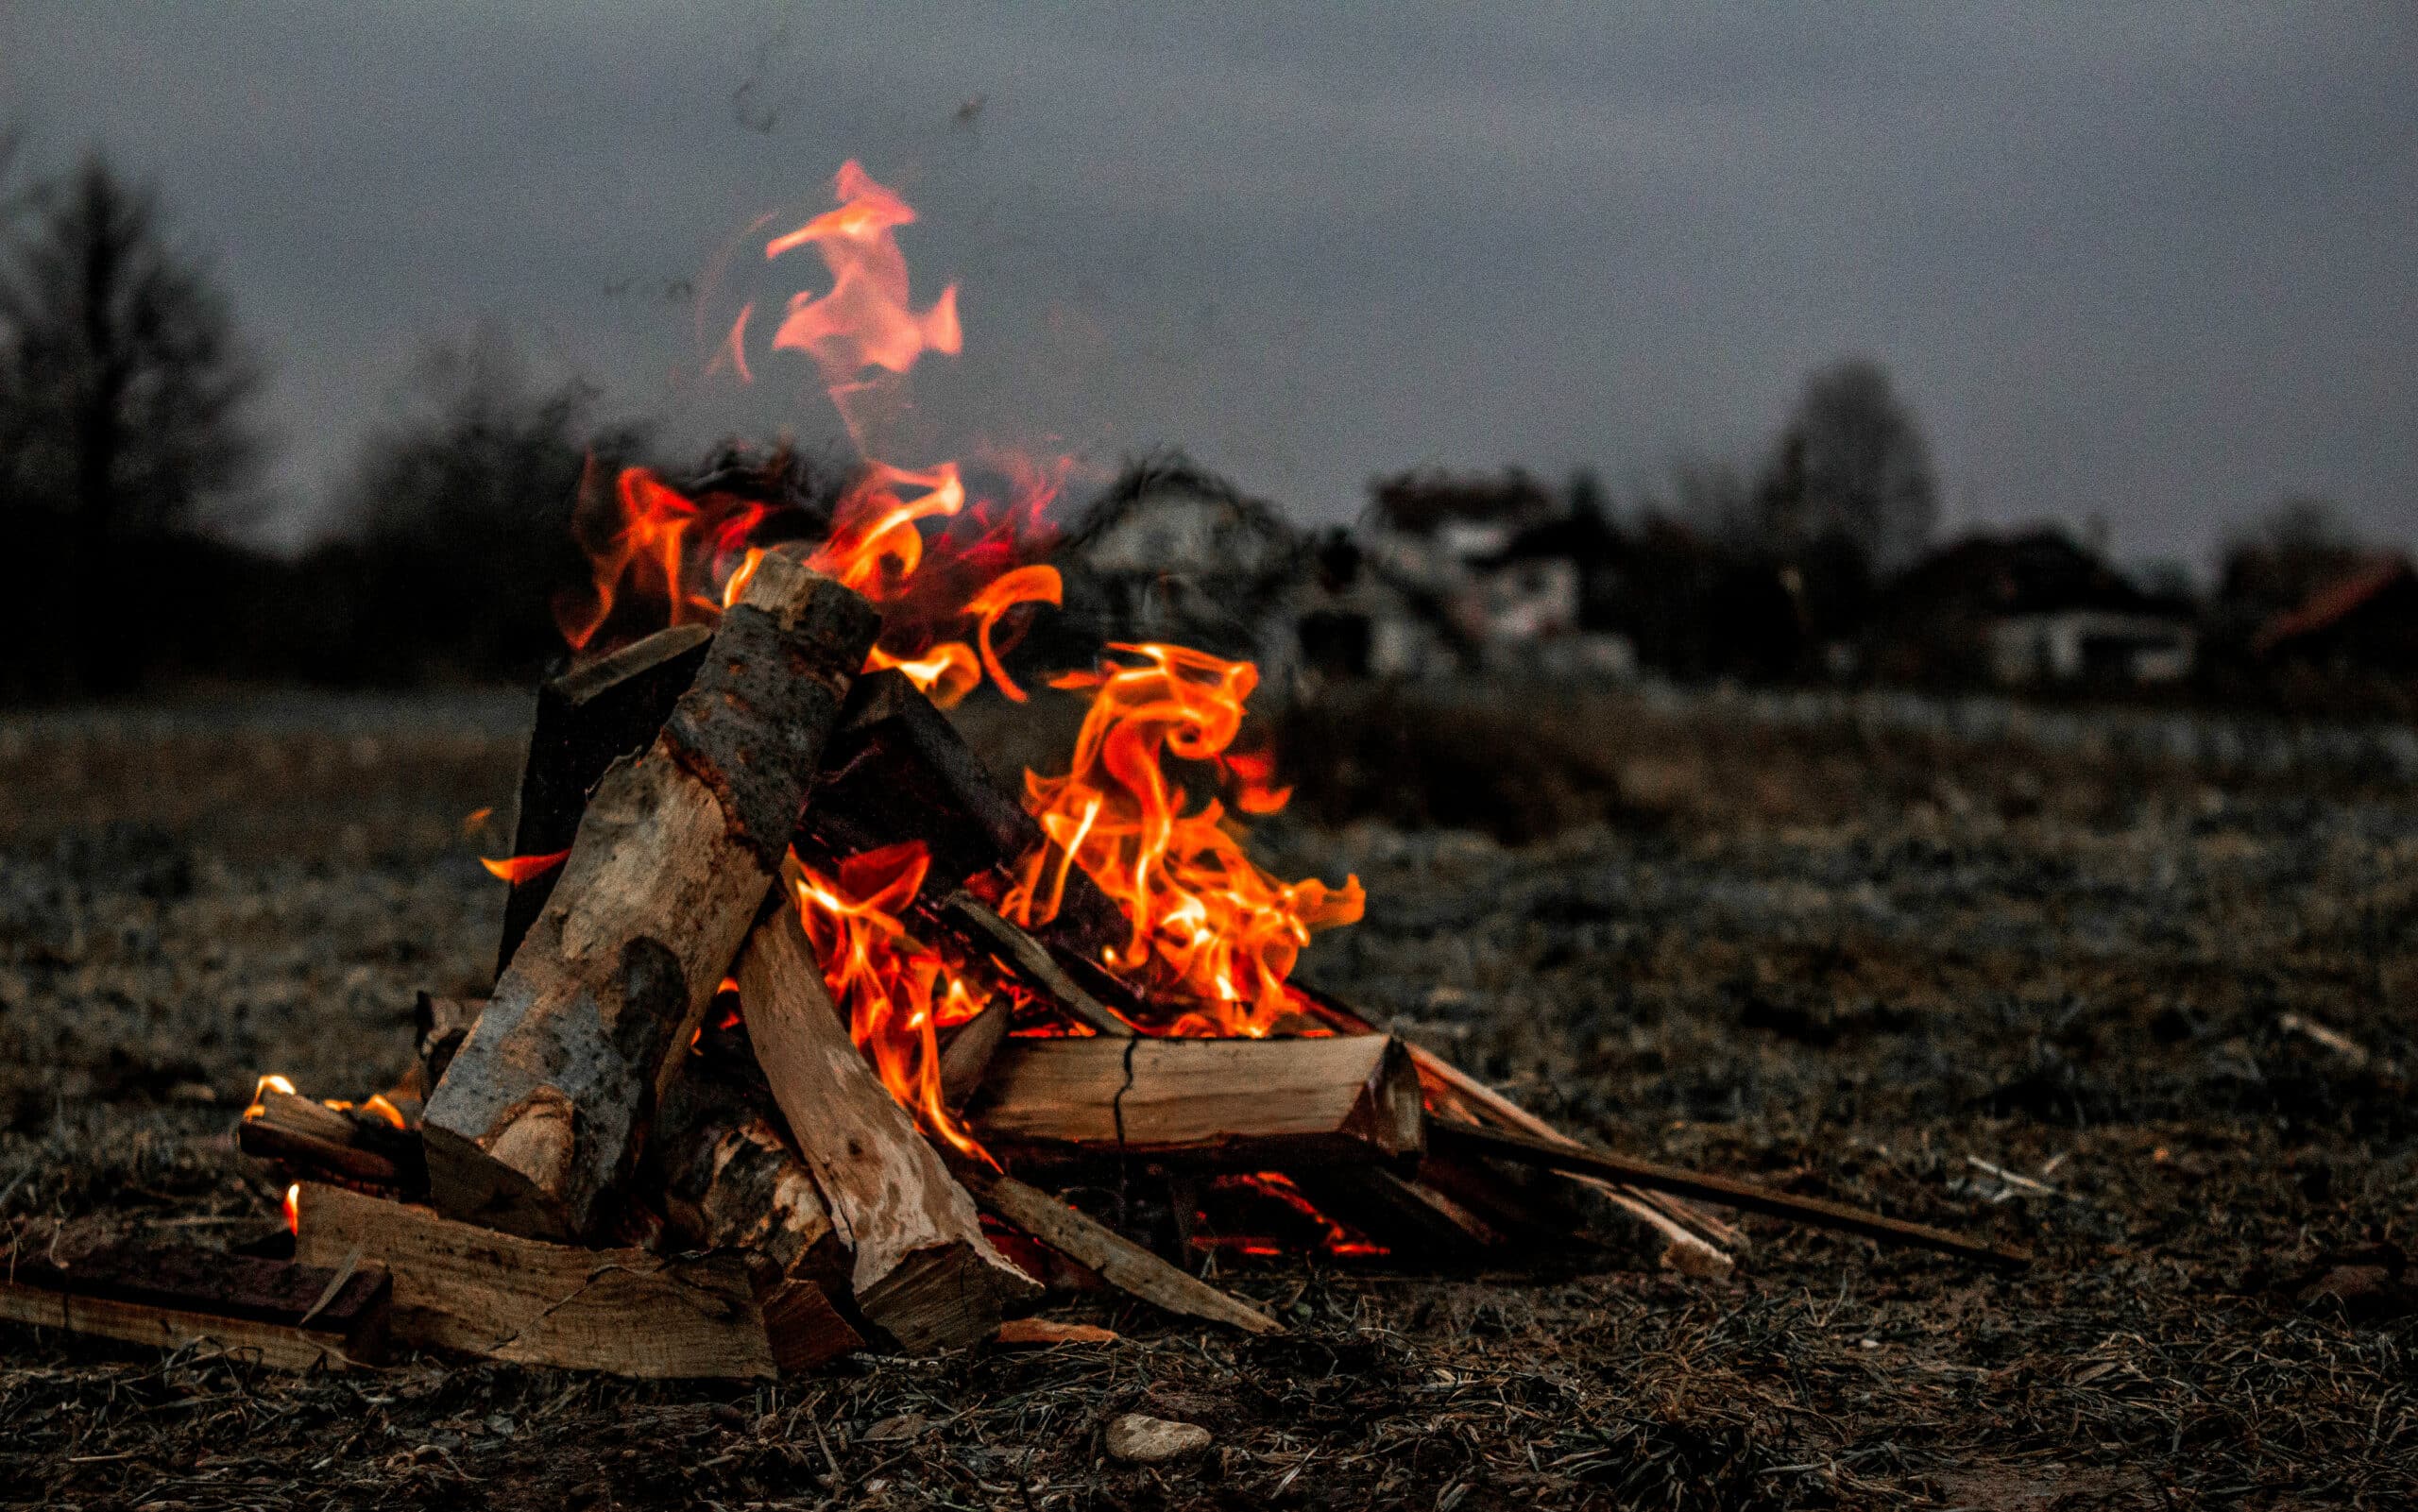
Any wilderness survival expert will tell you the most important thing to keep with you in a dire situation is your sense of calm. If, for whatever reason, you’re out there in the woods without matches, lighters, firestarters, or blowtorches, knowing you possess the ability to start a fire will not only keep you warm, it’ll keep you confident, focused, and making good decisions. Plus, starting a fire without matches is one of the cooler skills a person can master.
The more often you practice these firemaking skills in non-emergency settings, the more likely you’ll be able to pull off the trick when the situation demands. Only the very luckiest soul will try one of these methods and find success on the first go. So practice, practice, practice. And then bring a backup firestarter. And a backup for your backup.
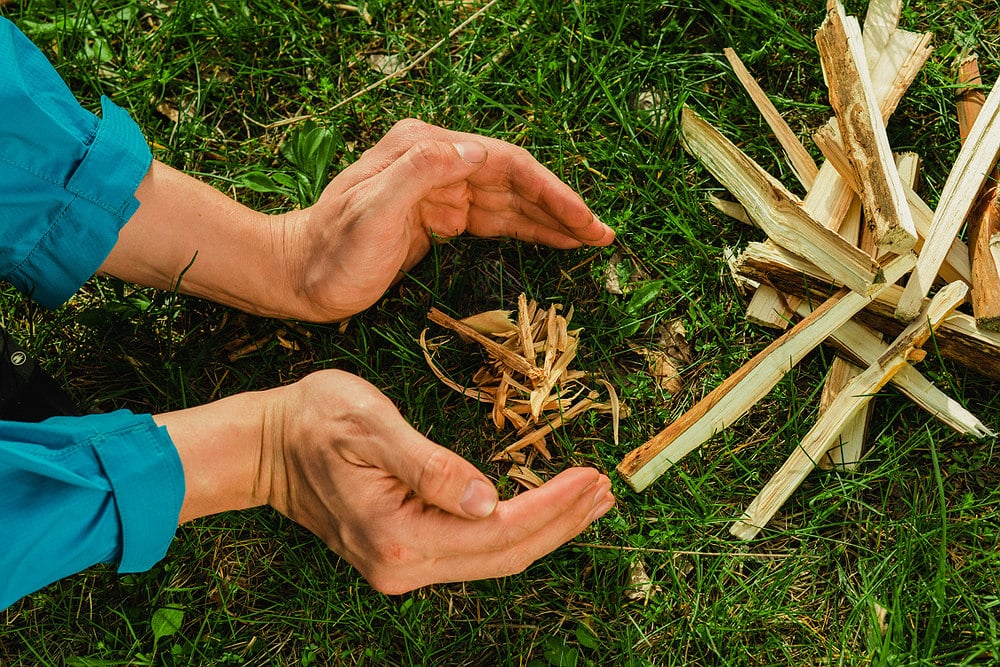
It starts with tinder
Starting a fire without modern conveniences means asking a very small spark or a very small amount of heat to blaze into a roaring inferno. Giving those shy sparks something to work with means tinder — specifically a tinder nest. Each fire-starting method described below will start with one.
Picture a bird’s nest. Now try to create one using the driest stuff you can find. You’ll want larger material on the outside, medium material lining that, and superfine stuff inside. The larger, outside material can be long, dry grasses, long strips of bark (birch, juniper, sagebrush bark, all good candidates), or long dried pine needles. Shape these into a sort of base. If your basket weaving skills aren’t what they used to be, don’t worry — your nest can even be a well-stacked pile. The bundle you create has to hold together well enough that you can fold it and lift the whole thing into the air without it falling apart.
The medium tinder layer can be crushed leaves, smaller roughed up and shredded bark, the pounded pithy stalks of yucca, cattails, and thistles, or any dry material you crush, shred, shave, or otherwise make smaller. Inside your nest, you’ll add the finest material. Dust from your crushed bark and leaves, downy seed fluff from bushes, sawdust from dry wood. Tinder nests can be made from a single material that you work into different thicknesses/solidities.
Look for punkwood
One material in particular makes a very nice tinder: punk wood. When a tree dries, fungus breaks it down. At a certain point of the decomposition process, the wood becomes very lightweight, velvety to the touch, and spongy. Look for it in the stumps of fallen trees. It’ll be light tan, or even white and look like it’s a little shredded. You’ll know you’ve found punk wood when you (easily) break off a chunk with your knife, squeeze it, and feel convinced you’re squeezing a kitchen sponge. If it turns to dust when you squeeze it, it’s a little too far gone and doesn’t make great kindling.
The best way to use punk wood for starting a fire is with charred punk — taking a piece of burning punk and enclosing it in a tin to smother it, then using ground up char to catch a spark. But this is about not having a fire, so just think of it as a good thing to bring along if you ever plan to be in a matchless situation again.
Now you need kindling and fuel
Once you have your tinder nest, you’ll need something to feed your eventual fire. Gather your fuel now or risk losing your ember while you search for something to sustain it. Kindling is little dry sticks and twigs about the width of a pencil and up to two feet long. Gather a lot, a bundle the diameter of a basketball is a good amount — but also a lot to carry, so now might be a good time to find a spot for your fire.
Ideally you want a level spot, free from excess vegetation, and sheltered from the wind. Finding a south-facing rock overhang would be akin to finding a room at the Hilton right about now. Barring that, putting a stand of shrubs between you and the prevailing breezes will help. (Remember, don’t build your fire under the branches of trees, or your small survival fire could turn into something terrible.)
After kindling, collect larger pieces of fuel. Dead branches the diameter of your arms are good. Break longer branches to size by leaning one end on a large rock and giving it a good downward kick. Ideal pieces are dry, about a foot and a half long, and average forearm-width. You don’t want a huge fire, they burn fuel faster and are more difficult to control.
Set out your larger pieces of fuel and build your kindling sticks into a conical shape (tipi style) with a small gap on one side (this is where you’ll insert your burning nest).
Now all you need is a spark. For that, let’s look at what you have.
I have a camera lens or a pair of binoculars
Is the sun out? Then, you sir, have fire. Think back to the days when you melted your Army guys with a magnifying glass and get started. Any convex (thickest in the middle) lens will focus the light of the sun and create a flame. Focus the pinpoint on the center of your tinder nest. Once it catches (starts to smoke) move on to the ember section below.
I have a dead lighter
Unless your flint is dead too, your lighter will still make sparks and using it is far easier than using a rock and steel. Aim your lighter at the center of your tinder nest. Flick your lighter, looking for a small wisp of smoke each time. Once you see a wisp, move on to the ember section below.
I have some combination of a hatchet, knife, and shoelace
Lucky you. Friction fire is what you want to try. There are three common methods that basically amount to rubbing one piece of dry wood against another while capturing the created ember. The simplest is the fire plow.
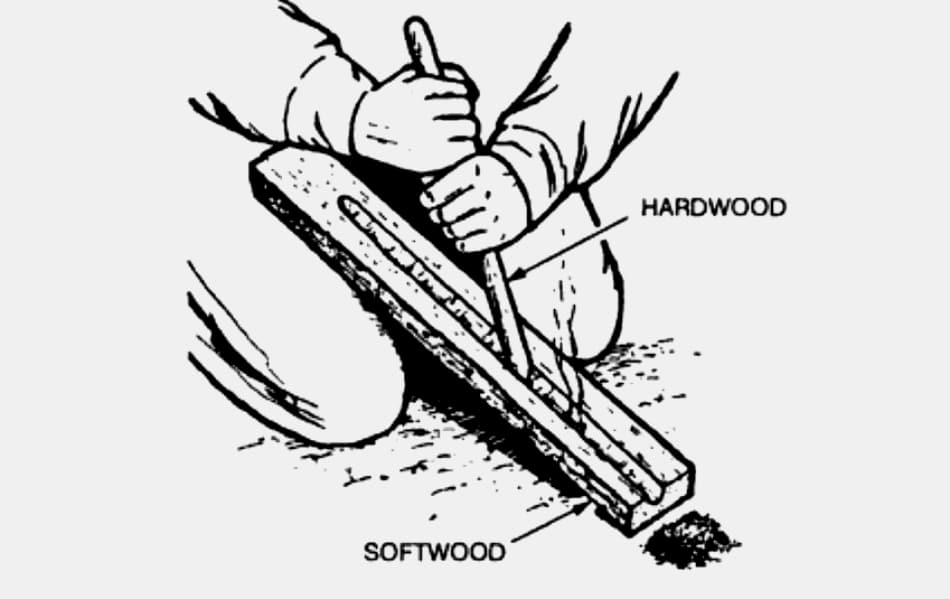
Fire plow
Find a large dead and dry branch or log. If it’s not already there, move it into a sturdy, braced position that won’t move around as you apply force. Scrape off the bark and make a flattish plane a little over a foot long. Using your blade, dig a narrow, shallow channel along the length of the plane. This is your fire board.
Next look for a dry branch about a foot and a half long and about an inch around. This is your plow. Carve one end into a narrow wedge. Cut the tip at a about a twenty-degree angle. The narrow channel and pointed end of your plow minimize the surface area where the friction occurs, making it easier to work your plow and maximizing a potential ember.
Press down as you use both hands to run your plow up and down the channel. When your arms start to rebel, that’s when a wisp of smoke will appear. Try to keep going. The plow is building up and pushing charred dust towards the end of the channel. Ideally this dust is a cocoa color (too light brown you’re not pushing hard enough, black, you’re pushing too hard). Once enough charred dust builds up at the end, you’ll see a good amount of smoke and an ember. Using a leaf, carefully transplant it to your tinder nest and move to the ember section below.
Hand drill
Slightly more complex than the fire plow, the hand drill still consists of just two parts. Using your hatchet skills, you’ll need to split a non-resinous (ie, not pine) soft wood log with the aim of coming away with a thin board — admittedly not an easy task with just a hatchet. Luckily, the board doesn’t need to be very large. Ten by four inches is ample (smaller than that will work too) but not much more than a half inch thick.
Next you’ll need a spindle. It needs to be straight as an arrow and about two feet long. Plant stalks like yucca, mullein, cattail, horseweed, and goldenrod are excellent choices. Remove any rough spots or bumps that could poke or rough up your hands and whittle a nice pointed end onto it.
Carve a small divot where the spindle can spin very near the long edge of the board. Bracing the board with a knee or foot, put the spindle in the divot and start spinning the spindle between your hands, applying downward pressure. After building up a little friction and creating some char, set aside your spindle and cut a small wedge out of the now darkened divot hole. Looking down on the divot, imagine the circle is a pizza, cut out a pizza slice from the edge with the pointy end of the slice about a third of the way into the center of the circle. This wedge lets the burning tinder fall beneath the board. Set a leaf under the board to collect the ember.
Spin the spindle in the divot, using the entire length of your hands (not just the palms) and apply downward pressure, moving your hands downward along the length of the spindle. Each time you move your hands back to the top of the spindle, be sure the spindle stays in contact with the board. When you start to see smoke, try to go a little faster with more downward force, that is, if your arms and hands still have the power to do so.
Once you see a steady stream of smoke, collect your ember on the leaf (you may need to poke it down if it sticks to the wedge in the board) and move to the ember section below.
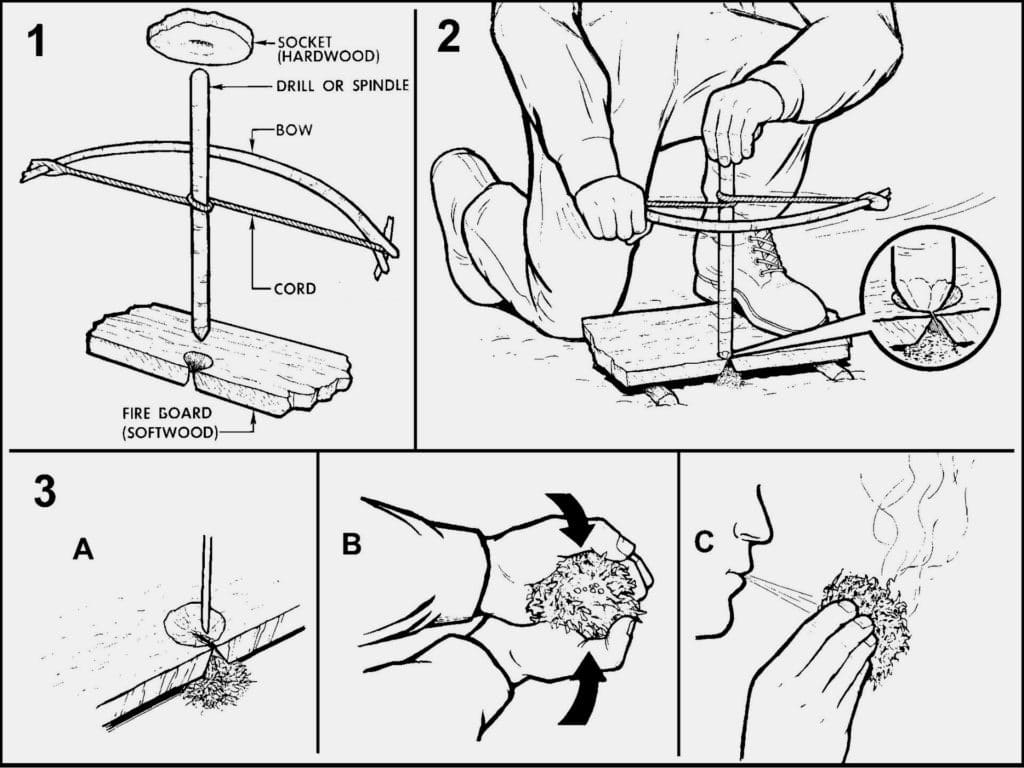
Bow drill
This uses the same two components as the hand drill (with a shorter spindle) but adds three more working parts. Namely a shoelace or paracord, a curved branch, and a bearing block or socket. Find a green, curved branch about two feet long and tie the cord to either end. Then look for a socket — a piece of harder wood (resinous is good) that fits comfortably in your hand. Carve a pit into the center where the top of your spindle will sit. You can grease the top of the spindle by running it through your hair or against the side of your nose (weird but effective). Loop the cord once around the spindle and set the socket on top.
Begin to work the bow back and forth, pressing down on the socket. The spinning action is much the same as the hand drill, but faster with less effort. Start slower, then speed up when you see the first wisps of smoke. Once it’s really smoking, grab your ember and move to the ember section below.
I just have my knife
Luck might still allow you to find boards, plows, and/or spindles that don’t require hatchet-level alteration, but if that’s just not in the cards, it’s possible to get a spark off your carbon steel knife and a piece of very hard rock like flit, chert, or quartz. Look for a graspable piece of one of these rocks — along river beds is a nice place to look. They will have a dull, glassy translucence and will break and chip in hard, sharp flakes. Color will range from dark dull grey and brown (flint and chert) to white and pink (quartz).
The best way to tell if you’ve found a rock that will make sparks is to test it with your carbon steel knife as you hunt. First break or chip the stone to expose a sharp edge. Holding the stone in your non-dominant hand, use the back of your knife to strike it with a downward, glancing blow. If you’ve got a good stone, a blow will throw sparks. Aim the sparks at your tinder nest and be prepared to repeat the strikes. A lot.
If your knife is coated, the coating will need to be scraped away (repeatedly striking the back of the blade against a rock is a conveniently great way to do this). Also be aware of your nest. A missed blow can send your knife rocketing into the tinder, scattering it, which is an indescribably upsetting occurrence.
Catching a spark off of a flint rock is about a hundred times easier if you hold a piece of char cloth to the stone. But char cloth is something you make when you have a fire. Another thing to make at home and bring along for next time.
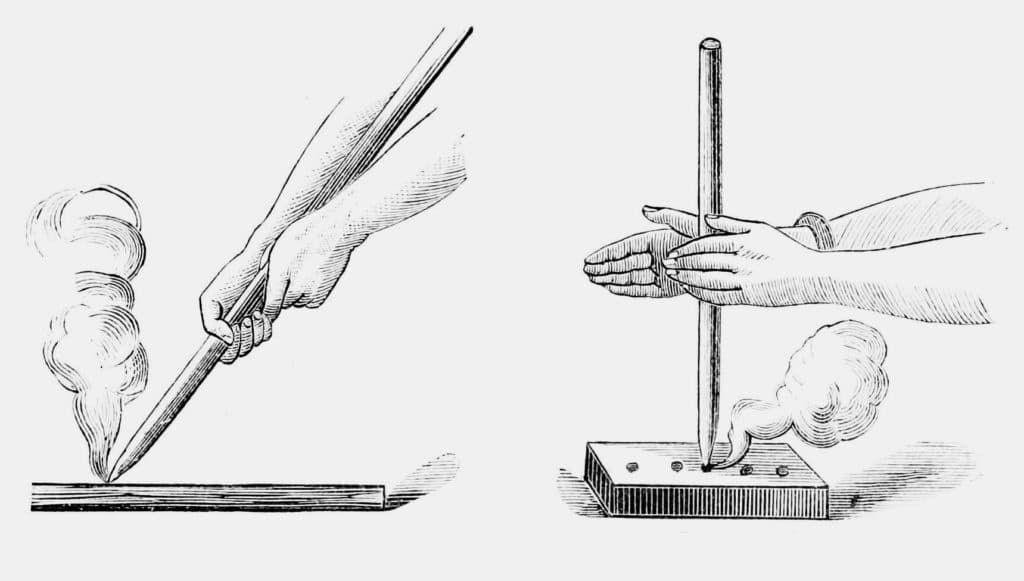
As soon as you see a bit of smoke created by your sparks, fan the glow and move on to the next section.
Now you have an ember
Congratulations. Once you’ve got a glow, an ember, some smoke sitting in your tinder nest, carefully scoop up the nest, fold it into a taco shape and lightly blow short puffs into the nest to build the flame. The smoke will grow and intensify until, in a split second, the nest catches. Carefully move the nest to your kindling tipi and put your flaming creation into the opening. When the kindling catches, add your fuel.
A log cabin shape allows airflow and is extremely easy to build. Lay two logs parallel to one another on either side of the fire. Lay two more logs perpendicularly across the ends of the first two logs, closer to the fire this time. Set a third set of logs on top of these two logs, again perpendicular and even closer to your kindling pyre.
Practice these skills, master them, and then laugh at matches — you’ll never need them again! Of course, that’s completely false. Getting even halfway good at any of these skills will only make you appreciate the value of matches, ferro rods, fire starters, and lighters even more. You’ll start putting matches in every pocket you own.
Disclosure: Clicking on these links and making a purchase may earn us a small referral fee, at no extra cost to you. Learn more here.